Dynamic Island Animations with Popmotion in angular
The introduction of dynamic islands in iPhone 14 piqued the interest of many designers and developers - coming up with creative ways to utilize the shape-shifting bubble.
Most of the iOS implementations you see online use a morphing technique called metaballs. With metaballs, an element will start to stretch towards each other as the objects get closer to each other. The image below shows the difference between the default behavior and when using the metaballs morphing technique when two elements are close to each other.
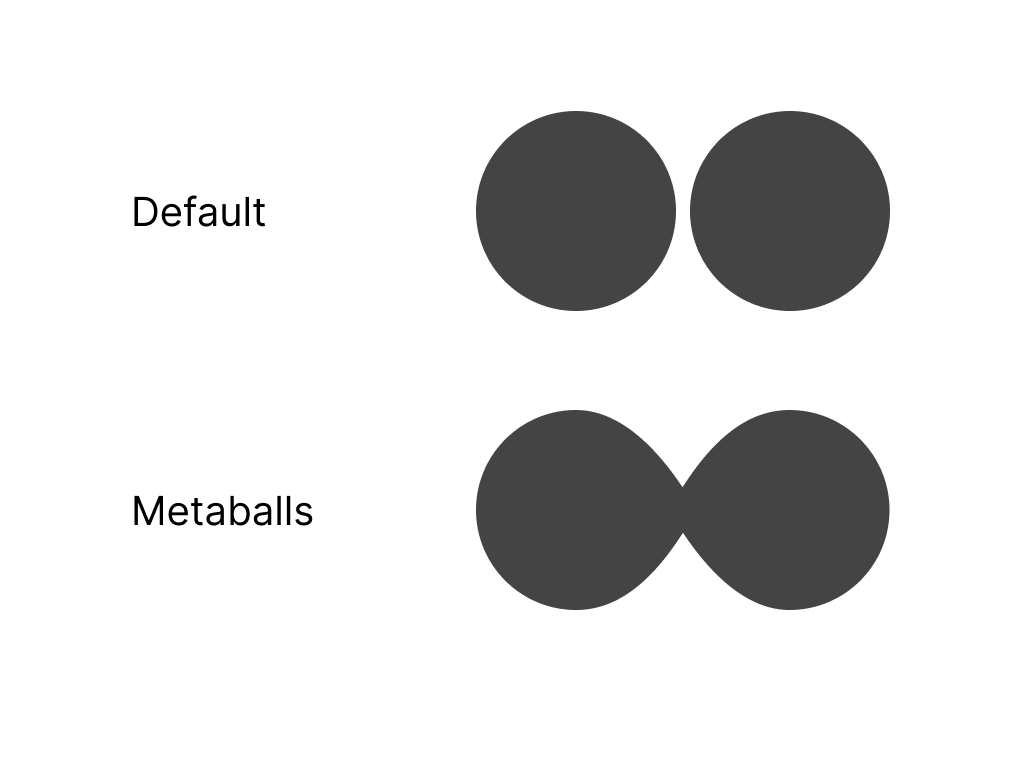 Default behavior vs metaballs comparison
We will not be implementing this technique in this tutorial. We'll stick to the basics of transforming the element from the default dynamic island to a bigger container with additional contents. Let me know in the comments if you are interested in a more advanced tutorial covering how to create this animation using metaballs.
This blog post will walk you through creating a dynamic island-style animations in your Angular applications. We'll be creating the following animation in an Angular application with the help of Popmotion and Angular Animations.
 Demo of dynamic island animations in an Angular application
Prerequisite
To follow along, create a new Angular application by running the following command:
ng new dynamic-island --routing --style=scss
If you are new to Angular, follow the Getting Started guide to set up your local dev environment.
Popmotion
Popmotion is a JavaScript animation library that supports keyframes, spring, and inertia animations. Install PopMotion dependencies by running the following command:
npm i --save popmotion
We'll also be using Stylefire to apply dynamic styles to our target element and access the target element's current styles. Install Stylefire dependencies by running the following command:
npm i --save stylefire
Ionic (Optional)
We'll use Ionic components to create the progress bar and IonIcons for our control buttons. This step is optional. You can use the default HTML progress bar or other icon libraries for your application.
To use Ionic in your Angular applications, install Ionic dependencies by running the following command:
ng add @ionic/angular
Install IonIcons dependencies by running the following command:
npm i --save ionicons
Setup
For simplicity, we'll create the animations in the default AppComponent.
Let's start with creating our template for the dynamic island. Open app.component.html and add the following 👇
<!-- src/app/app.component.html -->

<ion-content [fullscreen]="true">

  <div class="dynamic-island-container">

    <div class="dynamic-island">
    </div>
  </div>
</ion-content>
Next, add some styling to our container and the dynamic island element. Open app.component.scss and add the following 👇
// src/app/app.component.scss

ion-content {
  --background: linear-gradient(to top right, #09033D, #276176);
}
.dynamic-island-container {
  display: flex;
  flex-direction: column;
  align-items: center;
  padding-top: 11px;
  .dynamic-island {
    width: 126px;
    height: 37.33px;
    border-radius: 18.67px;
    background-color: #222329;
  }
}
Checkpoint: Run ng serve and open http://localhost:4200 in your browser. You should see a dynamic island at the top of your page like this:
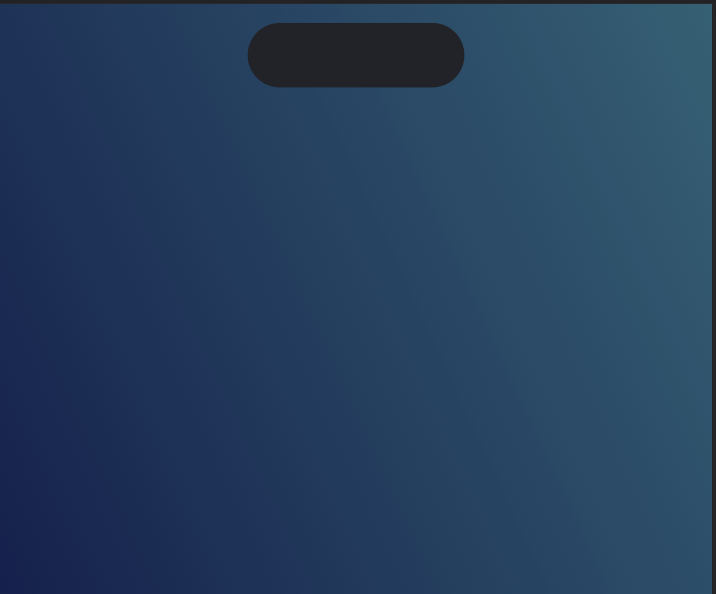 Checkpoint 1 - dynamic island default state
Dynamic Island Animation
We'll use Popmotion to expand the dynamic island from its default state to its enlarged state. First, we'll need to assign an id to our target element and add a click event handler on the dynamic island to toggle between its default and opened state. Open app.component.html and add the following code 👇
<!-- src/app/app.component.html -->

<ion-content [fullscreen]="true">

  <div class="dynamic-island-container">

    <!-- Update this 👇 -->
    <div #dynamicIsland class="dynamic-island" (click)="toggleDynamicIsland()">
    </div>
  </div>
</ion-content>
Next, use the ViewChild decorator to access the dynamic island element. Let's also create the toggleDynamicIsland function and add a variable to track the current state of the dynamic island. Open app.component.ts and add the following code 👇
// src/app/app.component.ts

// Update this 👇
import { Component, ElementRef, ViewChild } from '@angular/core';

@Component({
  selector: 'app-dynamic-island-popmotion',
  templateUrl: 'dynamic-island-popmotion.page.html',
  styleUrls: ['dynamic-island-popmotion.page.scss'],
})
export class DynamicIslandPopmotionPage {

  // Add this 👇
  @ViewChild('dynamicIsland') dynamicIsland: ElementRef;
  dynamicIslandIsOpen = false;

  // Add this 👇
  toggleDynamicIsland(): void {
    if (this.dynamicIslandIsOpen) {
        this.dynamicIslandIsOpen = false;
    } else {
        this.dynamicIslandIsOpen = true;
    }
  }

}
Use the styler function from stylefire to access the default dimensions of the dynamic island in the component's AfterViewInit hook. We'll assign this to a variable so we can use it in our open and close animations later.
// src/app/app.component.ts

import { Component, ElementRef, ViewChild } from '@angular/core';

// Add this 👇
import styler, { Styler } from 'stylefire';

@Component({
  selector: 'app-dynamic-island-popmotion',
  templateUrl: 'dynamic-island-popmotion.page.html',
  styleUrls: ['dynamic-island-popmotion.page.scss'],
})
export class DynamicIslandPopmotionPage {

  @ViewChild('dynamicIsland') dynamicIsland: ElementRef;
  dynamicIslandIsOpen = false;

  // Add this 👇
  private styler: Styler;
  private defaultDimensions;

  // Add this 👇
  ngAfterViewInit(): void {
    this.styler = styler(this.dynamicIsland.nativeElement);
    this.defaultDimensions = {
      borderRadius: this.styler.get('borderRadius'),
      width: this.styler.get('width'),
      height: this.styler.get('height'),
    }
  }

  toggleDynamicIsland(): void {
    if (this.dynamicIslandIsOpen) {
      this.dynamicIslandIsOpen = false;
    } else {
      this.dynamicIslandIsOpen = true;
    }
  }

}
Import Popmotion and create two functions - closeDynamicIsland and openDynamicIsland to close and open the dynamic islands. We'll use the styler defined previously to set the style of the dynamic island in Popmotion's onUpdate callback.
// src/app/app.component.ts

// Update this 👇
import { Component, ElementRef, NgZone, ViewChild } from '@angular/core';
// Add this 👇
import { animate as PopmotionAnimate } from 'popmotion';
import styler, { Styler } from 'stylefire';

@Component({
  selector: 'app-dynamic-island-popmotion',
  templateUrl: 'dynamic-island-popmotion.page.html',
  styleUrls: ['dynamic-island-popmotion.page.scss'],
})
export class DynamicIslandPopmotionPage {

  @ViewChild('dynamicIsland') dynamicIsland: ElementRef;
  dynamicIslandIsOpen = false;

  private styler: Styler;
  private defaultDimensions;

  // Add this 👇
  constructor(private ngZone: NgZone) {}

  ngAfterViewInit(): void {
    this.styler = styler(this.dynamicIsland.nativeElement);
    this.defaultDimensions = {
      borderRadius: this.styler.get('borderRadius'),
      width: this.styler.get('width'),
      height: this.styler.get('height'),
    }
  }

  // Update this 👇
  toggleDynamicIsland(): void {
    if (this.dynamicIslandIsOpen) {
      this.dynamicIslandIsOpen = false
      this.closeDynamicIsland().then(() => {
      })
    } else {
      this.openDynamicIsland().then(() => {
        this.dynamicIslandIsOpen = true
      })
    }
  }

  // Add this 👇
  openDynamicIsland(): Promise<void> {
    return new Promise<void>((resolve) => {
      this.ngZone.runOutsideAngular(() => {
        PopmotionAnimate({
          from: JSON.stringify(this.defaultDimensions),
          to: JSON.stringify({ borderRadius: 25, width: 400, height: 150 }),
          duration: 600,
          type: 'spring',
          onUpdate: (latest) => {
            const latestFormatted = JSON.parse(latest);
            this.styler.set('borderRadius', `${latestFormatted.borderRadius}px`);
            this.styler.set('width', `${latestFormatted.width}px`);
            this.styler.set('height', `${latestFormatted.height}px`);
          },
          onComplete: () => {
            resolve();
          }
        });
      });
    })
  }

  // Add this 👇
  closeDynamicIsland(): Promise<void> {
    return new Promise<void>((resolve) => {
      this.ngZone.runOutsideAngular(() => {
        PopmotionAnimate({
          from: JSON.stringify(
            {borderRadius: this.styler.get('borderRadius'),
            width: this.styler.get('width'),
            height: this.styler.get('height'),}
          ),
          to: JSON.stringify(this.defaultDimensions),
          duration: 600,
          type: 'spring',
          onUpdate: (latest) => {
            const latestFormatted = JSON.parse(latest);
            this.styler.set('borderRadius', `${latestFormatted.borderRadius}px`);
            this.styler.set('width', `${latestFormatted.width}px`);
            this.styler.set('height', `${latestFormatted.height}px`);
          },
          onComplete: () => {
            resolve();
          }
        });
      });
    })
  }

}
Call Popmotion's animate function outside of Angular's zone by wrapping it inside NgZone's runOutsideAngular function. This will escape Angular's zone and skips triggering Angular change-detection while executing the animation.
Checkpoint: Run ng serve and open http://localhost:4200 in your browser. Click on the dynamic island and you should see it expand. Clicking it again should animate the dynamic island back to its original state.
 Checkpoint 2 - dynamic island animation between default and expanded state
Dynamic Island Expanded Contents
Open app.component.html and add the following code to create the expanded dynamic island's contents 👇
<!-- src/app/app.component.html -->
<ion-content [fullscreen]="true">

  <div class="dynamic-island-container">

    <div #dynamicIsland class="dynamic-island" (click)="toggleDynamicIsland()">
      <!-- Add this 👇 -->
      <ng-container *ngIf="dynamicIslandIsOpen">
        <div class="dynamic-island-contents-container">
          <div class="info-container">
            <img src="https://avatars.githubusercontent.com/u/80924473?s=200&v=4"/>
            <div class="texts-container">
              <span class="playlist">This is Angular</span>
              <span class="title">Animations are pretty cool</span>
            </div>
          </div>

          <div class="progress-container">
            <span>3:20</span>
            <ion-progress-bar mode="ios" value="0.7"></ion-progress-bar>
            <span>-1:30</span>
          </div>

          <div class="controls-container">
            <ion-icon name="play-back"></ion-icon>
            <ion-icon name="play"></ion-icon>
            <ion-icon name="play-forward"></ion-icon>
          </div>

        </div>
      </ng-container>
    </div>
  </div>
</ion-content>
Let's also add some styling to the dynamic island's contents. Open app.component.scss and add the following 👇
// src/app/app.component.scss


ion-content {
  --background: linear-gradient(to top right, #09033D, #276176);
}
.dynamic-island-container {
  display: flex;
  flex-direction: column;
  align-items: center;
  padding-top: 11px;
  .dynamic-island {
    width: 126px;
    height: 37.33px;
    border-radius: 18.67px;
    background-color: #222329;

    // Add this 👇
    .dynamic-island-contents-container {
      display: flex;
      flex-direction: column;
      height: 100%;
      padding: 15px;
      .info-container {
        display: flex;
        flex-direction: row;
        img {
          background-color: #fff;
          width: 50px;
          height: 50px;
          border-radius: 10px;
        }
        .texts-container {
          display: flex;
          flex-direction: column;
          margin-left: 10px;
          align-self: center;
          span {
            &.playlist {
              font-size: 0.7rem;
              color: #999;
            }
            &.title {
              font-size: 1rem;
              font-weight: 500;
              color: #fff;
              margin-top: 2px;
            }
          }
        }
      }

      .progress-container {
        display: flex;
        flex-direction: row;
        align-items: center;
        padding: 10px 0;
        ion-progress-bar {
          height: 3px;
          flex-grow: 1;
          margin: 0 5px;
          --background: #555;
          --progress-background: #fff;
        }

        span {
          font-size: 0.7rem;
          color: #888;
        }
      }
      .controls-container {
        display: flex;
        flex-direction: row;
        align-self: center;
        ion-icon {
          color: #fff;
          margin: 0 10px;
          font-size: 2rem;
        }
      }
    }
  }
}
Checkpoint: Run ng serve and open http://localhost:4200 in your browser. Click on the dynamic island and you should see it expand, displaying additional content. Clicking it again should animate the dynamic island back to its original state.
 Checkpoint 3 - dynamic island expanded state's contents
Dynamic Island Content Animation
We'll use Angular Animations to create a stagger animation for the dynamic island's contents. Instead of rendering the contents immediately, the contents will slide up and fade in one after the other.
Open app.component.ts and add the animation definitions in the animations array inside the Component decorator 👇
// src/app/app.component.ts

import { Component, ElementRef, NgZone, ViewChild } from '@angular/core';

// Add this 👇
import { trigger, transition, style, animate, query, stagger } from '@angular/animations';
import { animate as PopmotionAnimate } from 'popmotion';
import styler, { Styler } from 'stylefire';

@Component({
  selector: 'app-dynamic-island-popmotion',
  templateUrl: 'dynamic-island-popmotion.page.html',
  styleUrls: ['dynamic-island-popmotion.page.scss'],
  // Add this 👇
  animations: [
    trigger('fadeSlideInOut', [
      transition(':enter', [
        query(':enter', [
          style({ opacity: 0, transform: 'translateY(30px)' }),
          stagger('50ms', [
            animate(
              '400ms cubic-bezier(0.17, 0.89, 0.24, 1.11)',
              style({ opacity: 1, transform: 'translateY(0)' }),
              )
          ])
        ])
      ])
    ]),

  ]
})
export class DynamicIslandPopmotionPage {

  @ViewChild('dynamicIsland') dynamicIsland: ElementRef;
  dynamicIslandIsOpen = false;

  private styler: Styler;
  private defaultDimensions;

  constructor(private ngZone: NgZone) {}

  ngAfterViewInit(): void {
    this.styler = styler(this.dynamicIsland.nativeElement);
    this.defaultDimensions = {
      borderRadius: this.styler.get('borderRadius'),
      width: this.styler.get('width'),
      height: this.styler.get('height'),
    }
  }

  toggleDynamicIsland(): void {
    if (this.dynamicIslandIsOpen) {
      this.dynamicIslandIsOpen = false
      this.closeDynamicIsland().then(() => {
      })
    } else {
      this.openDynamicIsland().then(() => {
        this.dynamicIslandIsOpen = true
      })
    }
  }

  openDynamicIsland(): Promise<void> {
    return new Promise<void>((resolve) => {
      this.ngZone.runOutsideAngular(() => {
        PopmotionAnimate({
          from: JSON.stringify(this.defaultDimensions),
          to: JSON.stringify({ borderRadius: 25, width: 400, height: 150 }),
          duration: 600,
          type: 'spring',
          onUpdate: (latest) => {
            const latestFormatted = JSON.parse(latest);
            this.styler.set('borderRadius', `${latestFormatted.borderRadius}px`);
            this.styler.set('width', `${latestFormatted.width}px`);
            this.styler.set('height', `${latestFormatted.height}px`);
          },
          onComplete: () => {
            resolve();
          }
        });
      });
    })
  }

  closeDynamicIsland(): Promise<void> {
    return new Promise<void>((resolve) => {
      this.ngZone.runOutsideAngular(() => {
        PopmotionAnimate({
          from: JSON.stringify(
            {borderRadius: this.styler.get('borderRadius'),
            width: this.styler.get('width'),
            height: this.styler.get('height'),}
          ),
          to: JSON.stringify(this.defaultDimensions),
          duration: 600,
          type: 'spring',
          onUpdate: (latest) => {
            const latestFormatted = JSON.parse(latest);
            this.styler.set('borderRadius', `${latestFormatted.borderRadius}px`);
            this.styler.set('width', `${latestFormatted.width}px`);
            this.styler.set('height', `${latestFormatted.height}px`);
          },
          onComplete: () => {
            resolve();
          }
        });
      });
    })
  }


}
Finally, add the animation trigger (fadeSlideInOut) to the target element and add *ngIf="true" to its direct children to create a staggering animation effect. Open app.component.html and add the following code 👇
<!-- src/app/app.component.html -->

<ion-content [fullscreen]="true">

  <div class="dynamic-island-container">

    <div #dynamicIsland class="dynamic-island" (click)="toggleDynamicIsland()">
      <ng-container *ngIf="dynamicIslandIsOpen">
        <!-- Update this 👇 -->
        <div @fadeSlideInOut class="dynamic-island-contents-container">

          <!-- Update this 👇 -->
          <div *ngIf="true" class="info-container">
            <img src="https://avatars.githubusercontent.com/u/80924473?s=200&v=4"/>
            <div class="texts-container">
              <span class="playlist">This is Angular</span>
              <span class="title">Animations are pretty cool</span>
            </div>
          </div>

          <!-- Update this 👇 -->
          <div *ngIf="true" class="progress-container">
            <span>3:20</span>
            <ion-progress-bar mode="ios" value="0.7"></ion-progress-bar>
            <span>-1:30</span>
          </div>

          <!-- Update this 👇 -->
          <div *ngIf="true" class="controls-container">
            <ion-icon name="play-back"></ion-icon>
            <ion-icon name="play"></ion-icon>
            <ion-icon name="play-forward"></ion-icon>
          </div>

        </div>
      </ng-container>
    </div>
  </div>
</ion-content>
Checkpoint: Run ng serve and open http://localhost:4200 in your browser. Click on the dynamic island and you should see it expand, animating the additional content as they enter the DOM. Clicking it again should hide the additional content and animate the dynamic island back to its original state.
Checkpoint 4 - dynamic island final demo
Wrapping up
The techniques covered in this blog post to create a dynamic island animation can also be applied in other contexts. For example, the same technique can be used to create an animation where a fab button expands into a full page modal when clicked. You can get creative with morphing animations and I think we'll be seeing a lot more of these types of animations as we get more accustomed to Apple's dynamic island interactions. Play around with this technique and I would love to see what you come up with!
If you are interested in more content like this or have any questions, let me know in the comments or tweet me at @williamjuan27.
Further Reading
- Explore more ways to add animations to your Angular application, check out Angular Animations Explorer.
- Read other animation-related tutorials in my blog.